Digging in, how to tame the jungle that is your new allotment without losing the plot!
Congratulations! You're now the proud owner of a patch of earth, a blank canvas for your green-fingered dreams. But let's be honest, that "blank canvas" probably looks more like a jungle right now.
Table of Contents
Don't worry, I've been there. My first allotment was less "allotment" and more "allot-lost-in-the-weeds." I have done it a couple of times now and while clearing a new allotment can feel daunting, but with the right approach, you can transform that wilderness into a productive paradise.
Step 1: Asses the situation.
I always start by having a good look around, marking the boundaries and making a few notes and plans on paper. Here’s the good news: every cleared allotment starts with chaos. The key is breaking it down into manageable steps.
Have a look over the rules on your allotment to make sure you don't fall foul of any regulations.
Are they knee-high nettles, persistent brambles, or just a carpet of grass? Identifying your weedy foes is crucial. Some weeds are shallow-rooted and easy to pull, while others have deep roots that require more… persuasion.
I remember once battling bindweed that seemed to stretch for miles! And just reappears the following year! It taught me the importance of knowing what I was up against.
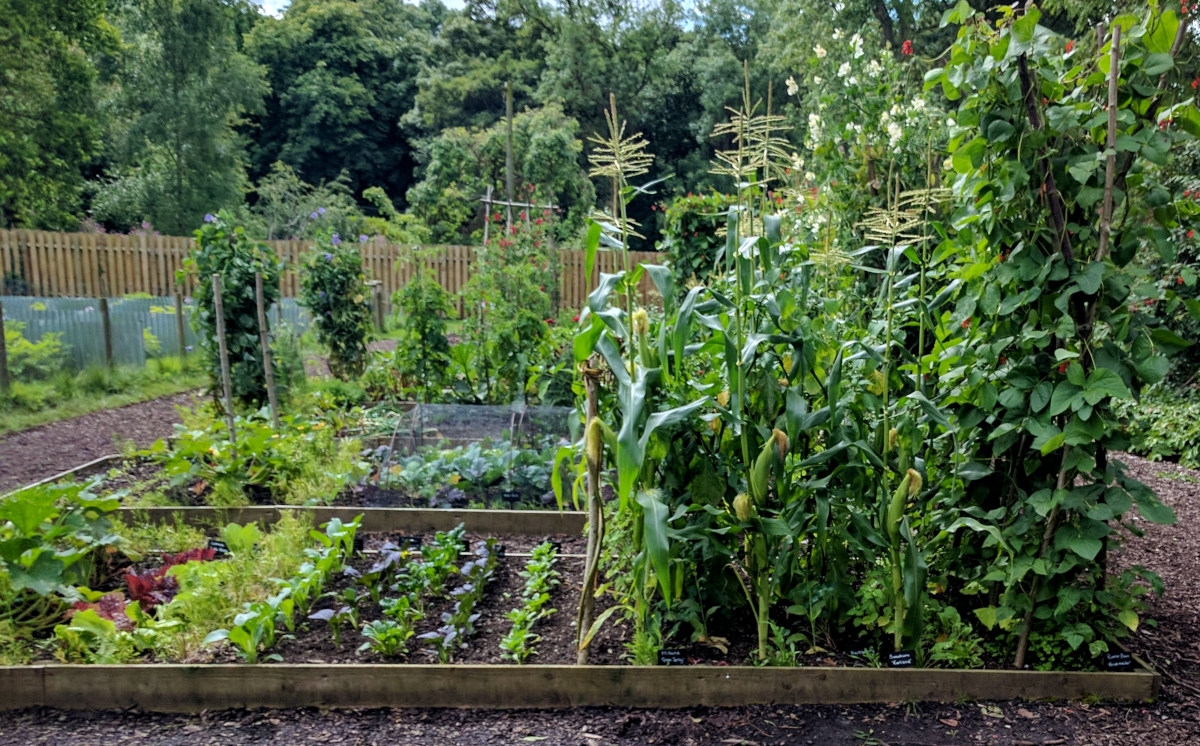
Below: This is what everyone has in mind when they think of their new allotment.
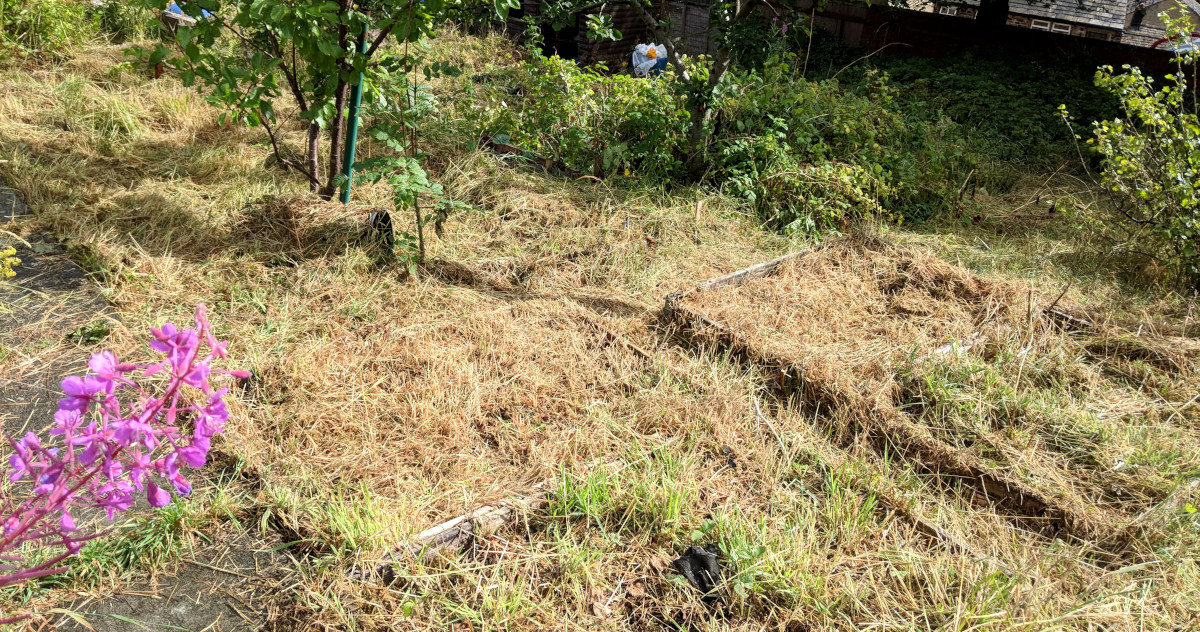
Below: The reality is probably more like this.
When you get on your new allotment it is likely they have been somewhat neglected.
Check for buried debris. Old tenants sometimes leave behind surprises—bits of plastic, glass, even old paving slabs. I had one where the previous tenant had used upturned wine bottles as the bed borders and many had broken.
I was lucky with all of my allotments, the first one had two large apple trees and a two plums trees as well as plenty of soft fruit that just need a little TLC.
Step 2: The big clear out.
Clearing an allotment is a marathon, not a sprint. Don't expect to transform it into a productive garden overnight. It takes time and effort. I would avoid using power machinery like Rotavators, they just chop and disperse weeds to all corners of the plot.
Be safe: Wear sturdy clothing and stout footwear and be mindful of the wild things that sting and bite.
Tools of the Trade: Arm yourself with the right tools. A sturdy pair of gardening gloves, a sharp spade, a digging fork, a hoe, and a good wheelbarrow are your best friends. Don't skimp on quality – cheap tools will break, and you'll end up spending more in the long run.
Use a tarpaulin: Lay it down to pile weeds on and avoid spreading seeds.
Tackle the big stuff first: Start with the toughest jobs—brambles, thick weeds, and any rubbish that needs clearing. Don’t bother with delicate weeding yet; focus on the major obstacles.
Be patient, persistent, and don't be afraid to ask for help from other allotment holders. They've probably been through the same thing and can offer valuable advice.
Top Layer Removal: If you're dealing with long grass or shallow-rooted weeds, a hoe or a strimmer can make quick work of clearing the top layer.
Below: Large areas may need power tools, I often use a strimmer for the initial clear, it's incredibly satisfying to watch those weeds disappear.
If your site allows the use of bonfires these can be an excellent way of clearing ground. Burning straw gets hot enough to kill the tops of the plants below and the ash is good for fertility.
Below: Bonfires can be useful to help clear ground before growing.
I bought a couple of bales of straw and cleared a small patch at a time while following all the usual safety precautions like doing it on a calm day with no wind and having plenty of water on hand.
Digging Deep: For tougher weeds like dandelions and couch grass, you'll need to dig them out. Use your spade and digging fork to loosen the soil and remove the roots. Be thorough! Any remaining roots will just grow back, and you'll be back to square one. Trust me, I've learned this the hard way!
Bramble Busters: Brambles are a different beast altogether, especially the old established ones that have dead dried stems all through them.
Wear thick gloves and use loppers or a pruning saw to cut them back. Be careful of thorns! I once spent a good 10 minutes trying to extract a thorn from my thumb – not fun.
Step 3: Layout, fences and the path to freedom.
My first allotment was on a 15 degree variable slope so it took some careful planning and construction.
This is the time to place any sheds and water butts as they are difficult to move when full.
Begin by removing rubbish, rocks, and anything that doesn’t belong. Old wood, broken pots, and random bits of plastic need to go. Check your allotment rules for disposal options, or repurpose what you can. That rusty old wheelbarrow? It could become a quirky planter.
Below: Laying out the beds and the paths.

Fences and borders are important when growing on allotments or community gardens as animals, pests and some people have problems with personal space and a clear boundary and gate does wonders for clarity.
Step 4: Tackle the weeds.
Once you've cleared the overgrowth, its time to tackle the weeds. The initial task is to try to remove all traces of couch grass with its rhizomes (underground stems) and perennial weeds such as docks, dandelions and nettles, including their roots.
Do not be to tempted to use a Rotavator. This will chop the offending plants into smaller pieces, spread them around which will make it a longer term task to clear the site.
Are you going No-Dig vs. Dig: There's a debate among gardeners about whether or not to dig. No-dig gardening is becoming increasingly popular. It involves adding a layer of compost or mulch to the surface of the soil, which helps to suppress weeds and improve soil health.
Digging, on the other hand, can help to aerate the soil and break up clumps. Personally, I tend to use a combination of both methods, depending on the specific needs of my allotment.
- Digging Pros: Immediate results, great exercise, lets you plant sooner.
- Covering Pros: Less effort, good for soil structure, kills weeds over winter.
I found no dig takes a little longer for results. Digging helps remove deep rooted weeds and you can sift and sort the stones and rocks from the soil as you go.
Below: A covering of heavy duty black plastic or membrane can kill weeds.
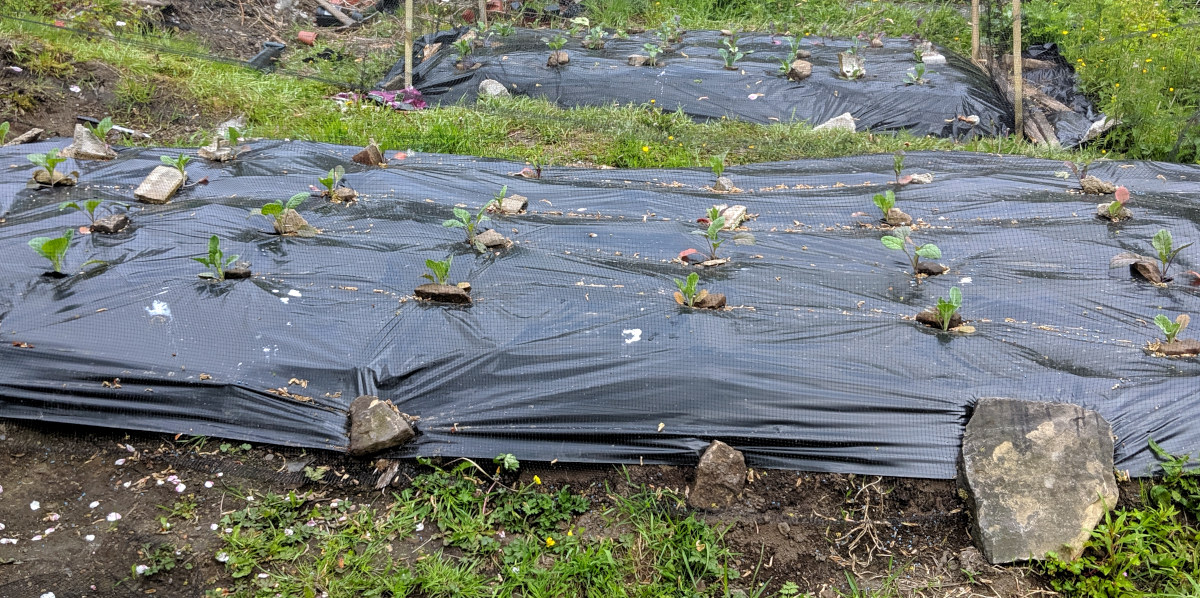
You can also plant through it and it acts like mulch.
Don’t forget to compost your waste plant material. This is a good way of returning nutrients to your soil and increasing the population of beneficial micro-organisms and worms.
Patience is a virtue – Rome wasn't built in a growing season.
Step 5: Improve the soil.
Once the weeds are under control, it’s time to assess and feed the soil. Allotment plots often suffer from neglect, so add plenty of organic matter like compost, manure, or leaf mould.
If you’re unsure about your soil quality, a simple soil test kit can tell you what you’re working with.
Once the weeds are gone, it’s time to assess the soil. Is it compacted? Waterlogged? Full of stones? Use your fork to loosen it, removing any leftover roots or rocks. If it’s heavy clay or sandy, mix in compost to improve structure.
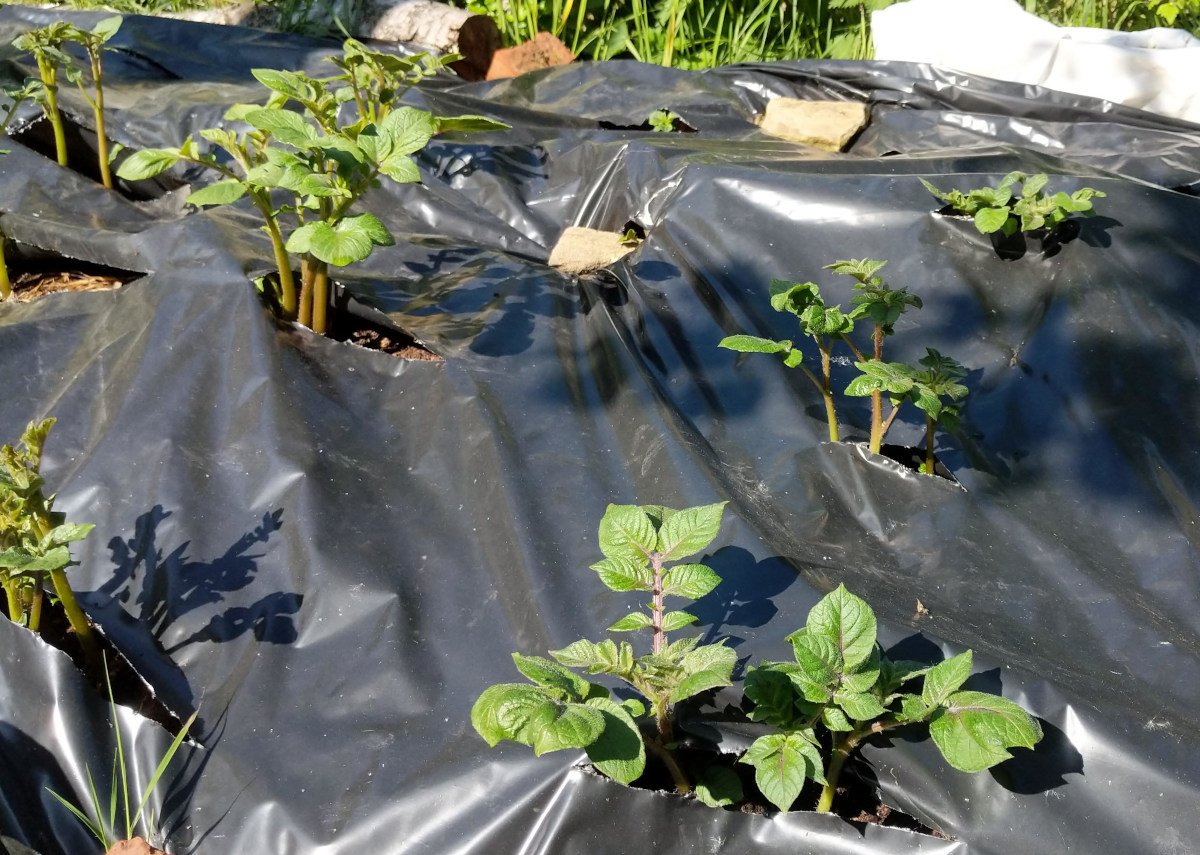
Below: Potatoes are a great first crop. Plant through plastic and they will break up the soil to quite a depth as they grow.
Compost everything you can: If you cut and lifted turf on your new allotment, simply stack it under cover for 12 months and you will have excellent top dressing. Weeds (without seeds), kitchen scraps, and grass clippings make great compost. It’s free fertiliser!
Step 6: Don't forget the water.
This is a n often overlooked and crucial step to making sure your veg has damp feet during the dry spells.
I have both a pond and water butts on my plots as my polytunnel gets through loads of water in the height of summer.
You will need to both collect and store vital water and as I discovered early on - keep it covered to keep leaves etc out and prevent evaporation.